
Transforming a Plastic Plate into a Stand

Creating a stand from a plastic plate is not only practical but also a delightful DIY project that allows you to repurpose materials creatively. With the right materials and a step-by-step approach, you can transform an ordinary plastic dish into a stylish and functional stand. Let's delve into the comprehensive guide to making your own plastic plate stand:

Materials Required:
Plastic plate
Round-colored cloth
Round-shaped coarse cloth piece

Embroidery floss in various colors
Glue gun with glue sticks
Copper wire
Metal connectors
Silicone beads for embellishment
White cotton ribbon embroidered lace for decoration.
Step-by-Step Implementation:

1. Initial Stage:
Begin by applying a generous amount of glue on the surface of the plastic dish.
Carefully place the round-colored cloth on top of the glue, ensuring full coverage.
Press down firmly to secure the cloth onto the dish, smoothing out any wrinkles or air bubbles.
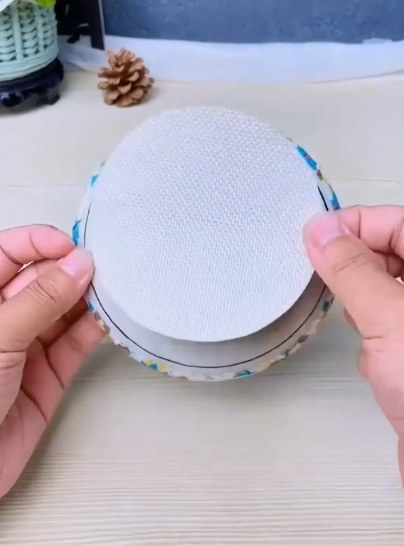
Flip the dish over and repeat the gluing process on the bottom surface.
Place the round-shaped coarse cloth piece on the glued surface to form a sturdy base.
Apply additional glue along the edges of the coarse cloth to ensure a secure attachment to the dish.

2. Intermediate Stage:
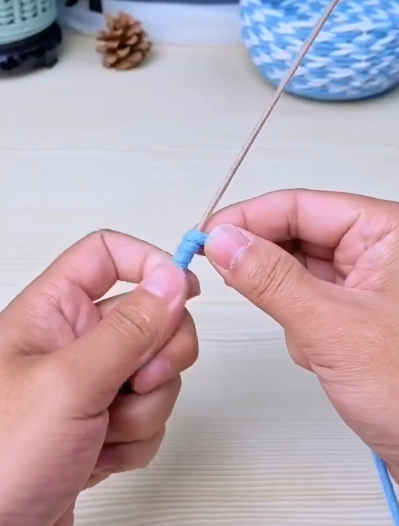
Cut the embroidery floss into small circles and start wrapping them around the circumference of the dish.
Wrap the floss tightly, ensuring uniform coverage from the base to the top of the dish.
As you reach the top, cut the floss and secure the end with a small dab of glue.

Proceed to attach pieces of copper wire along the outer edges of the dish using the glue gun.
Maintain a consistent distance between the wires and ensure they are parallel to each other.
Leave four copper wires longer than the rest, two on each side, to form the stand's handle.

Use two threads together to sew the wires, creating a sturdy and uniform knitting pattern.
Repeat the wrapping process until reaching the end of the shorter wires, then trim any excess floss.
3. Final Stage:
Wind one or two threads around each copper wire, securing the ends with glue for added durability.
Apply glue along the edges of the dish to prevent fraying and maintain the integrity of the design.

Secure the copper wires wrapped with thread to the edges of the dish to reinforce the structure.
Proceed to embellish the standby inserting silicone beads onto the wires for a decorative touch.
Connect the wires together using metal connectors, ensuring a snug fit and secure attachment.
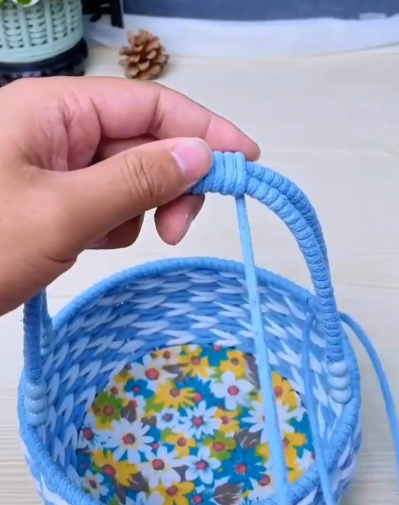
Wrap each wire individually with thread, starting from the base and working towards the top.
Combine the wires together in the middle and wrap them with thread to create a cohesive handle.
Complete the look by attaching a piece of white cotton ribbon embroidered lace along the edge of the stand for added elegance and charm.

Conclusion:
With these detailed instructions, you can transform a simple plastic plate into a stunning and functional stand that adds character to any space. Feel free to experiment with different fabrics, threads, and embellishments to personalize your stand and make it truly one-of-a-kind. Enjoy the process of crafting and showcasing your creativity through your homemade plastic plate stand!


.png)
